.

Showing posts with label gift card. Show all posts

Halloween Gift Card Holder

Hi!  I think I'm working backwards.  After a bunch of Christmas projects, I thought I'd better get onto Halloween.  And really what pushed me to start was TGF's Farm Fresh Friday Halloween challenge.  I thought I'd also play along with Crazy 4 Challenges C4C106--Halloween projects and Simon Says Stamp--use dies or punches.

I thought I'd make a little haunted house for Halloween.  I used TGF's Spooktacular set (rubber version).  It's now available in digi form.  I used Magnolia's Tilda lace die for the roof, Martha Stewart's scary fence punch, My Favorite Things grass die, and Spellbinders' rectangle dies for the windows and door (which got hidden by the witch).  I distressed the edges with my scissors and sponged some white over the house.

Here's a little close up.

The house opens up from the roof end to reveal a treat!  A gift card!  It's held closed with some velcro.  More trick or treaters from TGF's Spooktacular set.  I embossed some spider webs using Tim Holtz's embossing folder and sponged them in white.  The sentiments on the web are from the same TGF set.  The letters for Boo! were die cut using my Sizzlit alphabet die.  I'm not sure what it's called.

Here's a little close up of where the gift card goes.  You can see the spider sticker too.  I cut a small slit with one of the Spellbinders rectangle dies.  This house was made using the whole length of an 8.5 by 11 inch piece of cardstock.  The widest part of the roof measures 6 inches.

I thought this would be a cute way to give a gift card to one of my kids' teachers for Halloween.  Adults need treats too, especially teachers!

Thanks for reading and hope you're having a great weekend!

Birthday Gift Card Holder

I tried something a little different for a birthday card. I found it modified here on the Dandelion Designs blog that was initially a card here. I used the Amazing Duo boy again. He was a nice size to fit this card that measures about 4 inches by 3.25 inches. I still haven't used the girl superhero yet (not many girl birthdays in the summer of the people I know). Anyhow, he was colored with pencils and baby oil...at some point I really need to learn shading. So far I found 2 bloggers that use color pencils here and here that look really nice. But I haven't really been able to practice a whole bunch since I'm usually so last minute trying to make a card. And hard core crafters, please don't cringe, but I even had to buy a card for an upcoming birthday because after making this one, it was getting to be too much work for me. Mainly to try to get it in the mail on time. I guess I should plan ahead and try to make a whole bunch of cards beforehand so I always have a card ready for any occasion...but it doesn't usually work out that way.

Anyhow, I tried to limit the colors on his suit this time. Since I just used plain cardstock to make the card, I added some patterned paper die cut with a nestability. And used the same sizzix font for the number, I think I'm getting my money's worth just from birthday numbers. And the sentiment is from "birthday basics" from PTI (again).
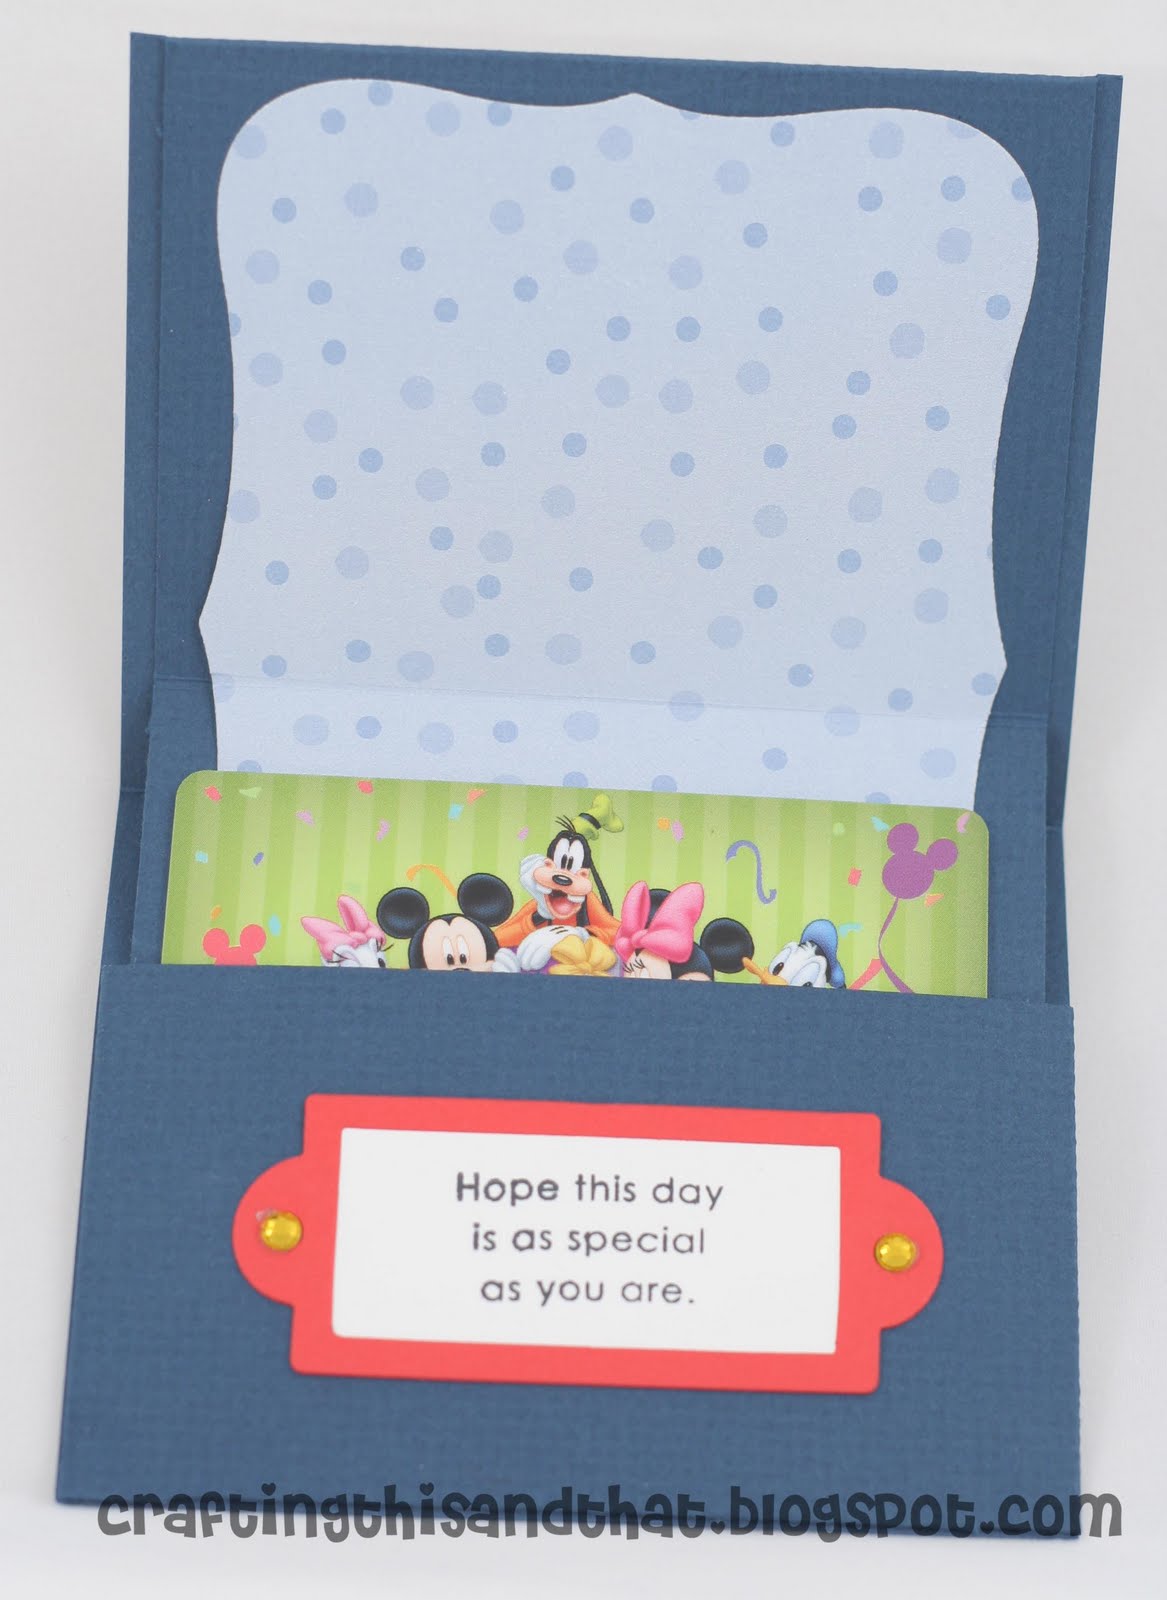
Here it is on the inside with a gift card, although it's not the real gift card, I just used it as a sample for photo purposes. I die cut the book plate with a sizzix die and stamped the sentiment from PTI's birthday basics. I used little stick-on gems for the bookplate holders.
Here's the side view of the fold. I guess I wouldn't have put brads or eyelets to fasten the paper bookplate anyhow since the inside of the pocket should ideally be smooth so the card can slide nicely. Hopefully my pocket doesn't come unglued... Anyhow, hope everyone is having a good holiday weekend!

Gift card holder

Hi!  I made a little something for TGF's Which One Wednesday Sketch #10, Ribbon Carousel's Challenge 18 All Tied Up (use more than 1 spool item), and Some Odd Girl Challenge Paper Piecing.

When I saw the sketch, it reminded me of a Double Pocket Card.  See HERE for a tutorial.  But I didn't follow the tutorial.  I made the bottom boxes in the sketch into pockets.  One to hold a gift card and the other to hold a little card for a message.

I used TGF's Vivi.  She is popped up a bit on the first pocket.

Vivi is paper pieced and I found my stash of bells after searching all my crafting bins.  I tied one on to the end of her cap with some twine and added some flower soft too.

This is what the inserts look like.  The smaller one will hold the gift card.  I just used some removable tape and an old gift card I found for reference.  The larger one has a label (from PTI) so my son can scribble his name on it.  Both the inserts have some ribbon tied on with twine. 

I made this one for my younger son's preschool teacher who is a man.  It's the first time any of my kids have had a male teacher as their main teacher so I was kind of stumped on gifts.  I didn't think a stack of cutesy note cards would appeal to a young guy so figure I better go the gift card route.  I have to make one more for the aide in the classroom.  She seems young too so I'm thinking gift card as well. 

So I've started my Xmas crafts for teachers.  Now I've got 3 kids in school, I'm starting early.  Not to mention all their extracurricular activities.

Thanks for reading and have a great long weekend!


hb2u -- part 2

Hi!  I'm back today to share what is on the inside of the card I shared last week.  Remember?

I used Yumi & Fumi from Yumi & Fumi Handmade on the outside of my card.  Check them out HERE.

On the inside, I thought it would be cute to put a little giftcard since it is a birthday card.

What makes this different is that you can tear it open to find the giftcard.  I'm not gonna give away all the details here.  So please check out Yumi & Fumi Handmade Crafts blog to see the tutorial.

Thanks for reading!


This & That and Another taj Card

What??!! Me? An enabler? I don't know what Cheryl's talking about. I merely make suggestions when I see something cute and if it's a good deal. I've been ordering stuff from www.peachycheap.com lately. Today's deal is really cute but I don't think it's the best deal out there. Too much shipping.

And I just discovered that there is another blog out there that has almost the same name as ours! It's Crafty This and That. Hope people don't get confused between the two.

One more thing before we get on to the card. I wanted to mention that I actually won something. A Sizzix Bigz Spiral/Garland die from Sunghee over at www.creativityinprogress.com/blog/. She made a really cute flower with the die, something I probably would not think about doing. I think she makes some cute stuff especially her mini albums which I am going to try to make one of these days. Thanks, Sunghee!!


I wasn't sure if I was gonna post this cause I didn't know if Cheryl would mind her daughter's name being so out there in blogland. But since she posted the favors, I'm thinking it's okay. Is it weird that we're both kind of private but want to blog? Anyway, another taj stenciled card. I know I kind of messed up the bunny's cheeks/whiskers. Usually I'd redo it but I made this the night before her party. Her name is die cut. The cupcake and party hat have little flower brads.


This is the inside. Please ignore the money!! I didn't have a photo without the cash plus I wanted to show that you can slip some money or a gift card into the slot. I found the template here. Sometimes I spend too much time blog surfing but this is what I came across and thought it would be super cute. I just made mine longer cause my card was bigger. Anyway, thanks for reading through this long post. Are you posting tomorrow, Cheryl? If not, I promise I'll post something that's not taj related.

Thanks a latte!

Hi!  Did you get my pun in my post title?  Made a little something for The Greeting Farm's last round of March Madness -- Mad about tea parties.  The theme includes anything tea related, coffee, cocoa, Alice in Wonderland, etc.  I had a few ideas running through my head and I was making a card at first but then I scrapped that idea.  And I rarely ever just give up on something but I didn't feel it, you know?  But it's okay, cause that led me to this project that I love and will probably make for my kids' teachers for the end of the school year. 

I made a little one cup gift card holder and caddy.  Please pretend that there is a Starbucks gift card in that cup. 

I had these cute Strawberry Shortcake cups leftover from my daughter's 4th birthday party.  Ummm, she's 10 now.  So I've had them stored away for a while.  I covered up Strawberry Shortcake's faces on the cup by using my Spellbinder's circle nestabilities to cut a circle the size that I wanted. 

The stamp is TGF's Fancy Anya and I love that her hands are in front because you can place just about anything in between and totally change the look and purpose of the card/project.  I've had her holding a camera and a pink ribbon too.  She is borrowing Cafe Ian's coffee mug. 

I curved the mug a bit with my fingers and used foam tape to give it a pop.

I cut a little oval handle in the top.  I made a tag using Spellbinders tag set.  I created the sentiment on the computer.  I just typed in thanks a whole lot (cut and paste a bunch at a time) and changed the font randomly.  I hope people get it though.  Took my hubby a second look before he said oh, thanks a latte.  Like thanks a lot. 

In order to keep the cup from tipping or sliding I added a thick piece (6mm) of fun foam on the bottom.  I found a circle die that matched the size of the cup bottom and cut it.  Fun foam is so versatile!  You can easily cut it with scissors or run it through your die cutting machine.  The foam fits snuggly on the bottom so you don't really have to tape it down.  And then the cup fits snuggly in the hole.

This is the view from the top.  I only had Easter grass that I didn't think matched too well so I ended up cutting an actual Starbuck's brown package with my shredder scissors after I ran it through my paper crimper.  Hopefully the teachers will use the cup/caddy for something else after too.  It could easily store some pencils/pens or rubber bands.  

I'm working on a boy version of this so I may do a little tutorial on it later too.

Thanks for reading!

Gift Cards

Hi!  Here is my last post for PTI's Make It Monday Challenge to partially emboss/deboss.  My other entries can be found HERE, HERE & HERE.

I made a frame from fun foam.  This one used three 2 mm thick fun foam layers cut to 3x3 inch squares.  That was the size of the gifts cards I wanted to make.  I posted about using frames to partially emboss HERE.

I had some leftover Stampin' Up 3x3 cards so I used the colored ones as the base and used the cream ones to emboss and stamp on.

Here's a close up.  My stamping is a bit off.  But I think it's still cute.  I used PTI's Book Print impression plate.  I can't believe how many projects I made just with that one impression plate.  I just ordered the numbers one so I can't wait to get that one.  I have a lot more I want to order too.  The flowers are from PTI's Beautiful Blooms 2 dies and stamp set.  I used the medium sized flower die set for these cards.  The sentiments are from Tag-its #1.  They are the perfect size to fit in the center.

I made a set in blue too.

A closer view of the blue one.

I stamped some envelopes too.  The To/From is from Fillable Frames #9.  I used the little heart one from Tag-its #1 as a postage stamp.  At the top you can see the little box that all these cards/envelopes fit into.

This is a template called Almost Square Bag from Little Potato House.  It is the cutest box and one of my favorite templates that Sunghee has created.  I just printed it and cut it out.  Placed a simple label on front and done.

What I love about this box too is that you don't have to worry about using adhesive or anything to close it.  There are 2 small little tabs that tuck into the sides.  So smart!  So you can open and close it as many times as you want to.

Well, I think I've exhausted most of my ideas for this challenge.  I had one other but it's going on the back burner for now.  This challenge really did open up so many possibilities and variations for embossing/debossing.  

Thanks for reading!

Meoples Gift Card Holder

Hello!  I've been meaning to post this.  I made a gift card holder for my kids' Sunday school teacher for Christmas and thought the Meoples' Nativity set would be perfect.  I used the digi set but there is also a rubber stamp set.  These are so cute as are all the Meoples!

This is the front.  It looks like a regular card with ribbon tied around to keep it closed.  The sentiments also come in the set.  The angel is so sweet!

This is the inside.  I folded up a portion of the cardstock to create a little pocket to hold 2 cards.  Aren't these Meoples adorable? 

It has been so cold and windy here!  I think we are being blown away! 

Thanks for reading!